
 BBQ & GrillBalochi Sajji
Crispy Hot Wings
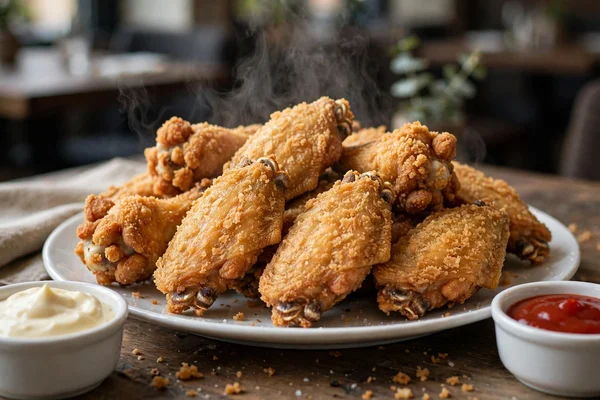
Double-coated, extra-crispy hot wings with a fiery glaze — restaurant-style crunch that stays crisp.
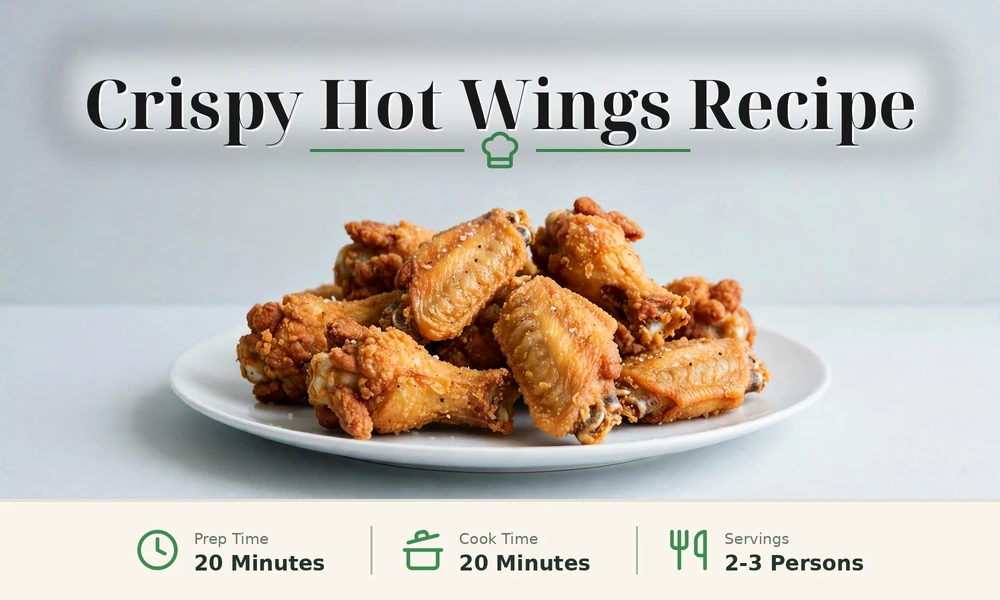
Prep Time:20 minutes, plus 3 to 4 hours of marination
Total Time:4 to 5 hours
Servings:10 hot wings, serves 2 to 3 people
Allergen warning
This recipe contains: Gluten, Soy. If you have a food allergy, check every ingredient label before cooking.
On this page
Skin-on chicken wings demand precision. Home cooks treat frying as guesswork; professional kitchens treat it as a controlled process with fixed variables: marination time, coating method, oil temperature, and fry duration.
Restaurant fryers run at 200°C (392°F) for breaded chicken, and that heat produces the rapid surface dehydration that builds the thick, craggy crust. This guide presents my professional method, the exact process I use in my restaurant kitchen: a 3 to 4 hour marinade, a double press-and-twist coating, a 30-second chilled water dip, and an 18 to 20 minute fry at 200°C.
| Calories | Protein | Carbs | Fat |
|---|---|---|---|
| 750 | 45 g | 30 g | 50 g |
Estimated values per serving. See the Nutrition section below for details.
🧂 Ingredients
For the marinade
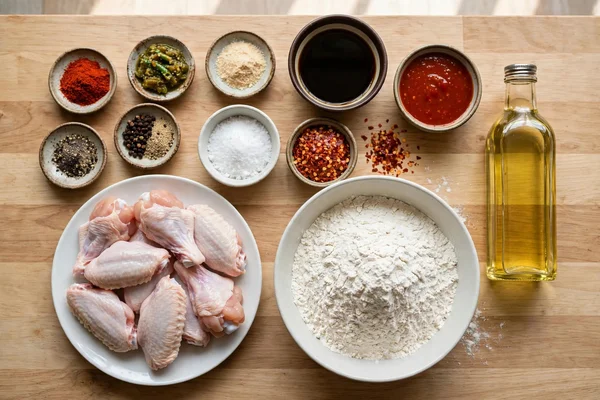
- 10 chicken wings, with skin on
- 1 cup soy sauce (240 ml)
- 2 tablespoons chili sauce
- 4 to 5 tablespoons crushed red chili flakes
- 2 to 3 tablespoons salt
- 5 tablespoons garlic powder
- 1 tablespoon green chili paste
- 3 tablespoons red chili powder
- 1 teaspoon black pepper
For the coating station
- 2 to 3 kg all-purpose flour in a deep bowl
- Chilled water in a separate deep bowl
For frying and serving
- Cooking oil for deep frying
- Mayonnaise of a good brand (see: restaurant mayonnaise recipe)
- Ketchup
Method
Step 1: Marinate the wings for 3 to 4 hours
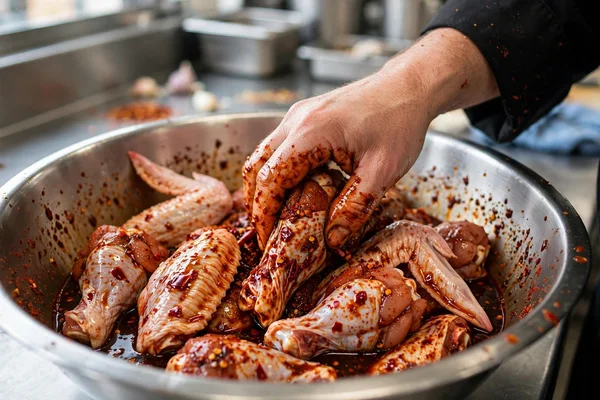
Wash the 10 chicken wings and drain the water fully. Place the wings in a large bowl. Add all marinade ingredients: soy sauce, chili sauce, chili flakes, salt, garlic powder, green chili paste, red chili powder, and black pepper. Rub the mixture into every surface of the wings. Cover the skin, the folds, and the joints. The wings should turn deep red when the coating is complete. Cover the bowl and refrigerate the wings for 3 to 4 hours. Use the lower portion of the refrigerator. Do not freeze the wings. The marination period drives the spices deep into the meat. The garlic and chili flavors settle during this time. The resting period also removes the raw chicken odor. Short marination produces surface-level flavor. Short marination leaves the meat tough and the chicken odor intact. Professional kitchens never shorten this stage. Give the marinade its full time.
Step 2: Set up the coating station
Pour the all-purpose flour into a deep bowl. Fill a second deep bowl with chilled water. Cold water from the refrigerator works best. Arrange the station in order: marinated wings, flour bowl, water bowl, and the fryer ready for heating later. Keep the hands dry before touching the flour. Wet hands create sticky lumps in dry flour. Sticky lumps ruin the coating. Keep a dry towel beside the station. Professional cooks follow this rule without exception.
Step 3: Press and twist the wings in flour
Place 1 to 3 wings in the flour bowl. Do not add more wings. Overcrowding presses the flour flat. Flat flour produces fewer crumbs. Fewer crumbs produce less crispiness. Bury the wings deep inside the flour. Press the flour firmly onto the wings. Throw flour over the wings with the hands until no chicken remains visible. The wings must stay completely buried. Twist the wings with the fingers while the wings stay buried. Press and twist. Repeat the motion for 1 full minute. Do not lift the wings out of the flour during this minute. The marinated spices on the wings mix into the flour during twisting. The mixture builds a thick, craggy coating layer. Professional cooks call this the press-and-twist technique. This technique separates restaurant hot wings from ordinary fried chicken.
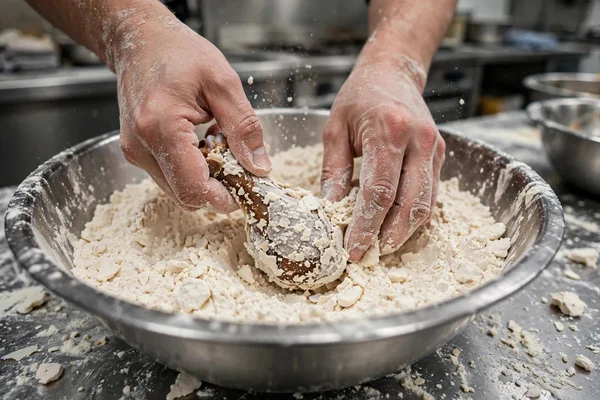
Step 4: Dip the wings in chilled water for 30 seconds
Lift the flour-covered wings out of the flour bowl. Place the wings immediately into the chilled water bowl. Keep the wings in the water for exactly 30 seconds. Count the seconds. The cold water hydrates the flour layer. Hydration helps the second coating adhere. The second coating puffs in the fryer and forms the signature crunch.
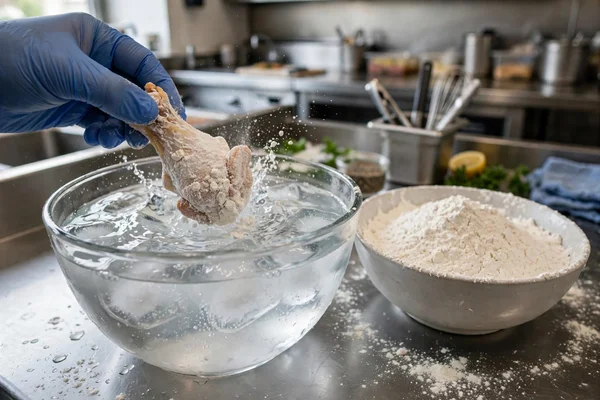
Step 5: Coat the wings a second time and move them to the fryer
Lift the wings out of the water. Place the wings directly back into the flour bowl. Repeat the full process: press the wings deep inside the flour, cover the wings completely, and twist with the fingers for another minute. Examine the wings after the second coating. Small crumbs and flakes cover the surface. These crumbs become the crispy crust in hot oil. Move the wings directly into the fryer after the second coating. Do not let the coated wings rest. The wings must enter the hot oil immediately.
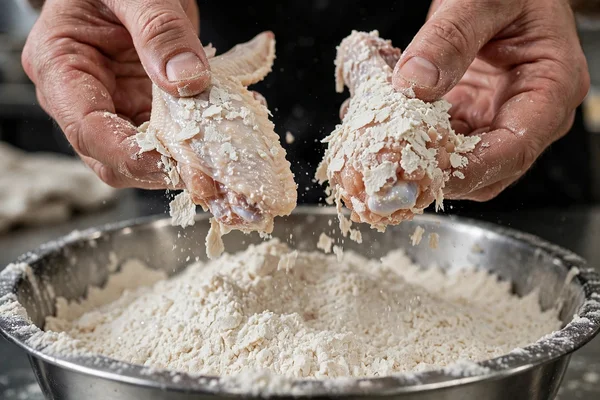
Step 6: Fry the wings at 200°C for 18 to 20 minutes
Heat the cooking oil to 200°C (392°F). Use a kitchen thermometer for accuracy. Professional kitchens rely on thermometers. Without a thermometer, keep the flame on medium to high. The oil should shimmer. The oil must not smoke. Smoking oil indicates excessive heat. Smoking oil adds a bitter, burnt taste to the wings. Lower the flame and wait if the oil smokes. Slide the coated wings gently into the hot oil. Fry the wings for 18 to 20 minutes. Wings with skin on require this duration. The long fry cooks the interior fully. The long fry builds a deep golden crust. Do not rush the process. Do not disturb the wings repeatedly. Remove the wings when the sizzling slows and the crust turns deep golden. Drain the excess oil. Repeat the coating and frying process for the remaining wings. Maintain the 1 to 3 wing limit in the flour bowl for every batch. Filter the flour after every 4 to 5 wings. Use a strainer. Coating leaves wet crumbs and lumps in the flour. Lumpy flour produces patchy, uneven coating. Clean flour produces clean, even, crispy wings in every batch.
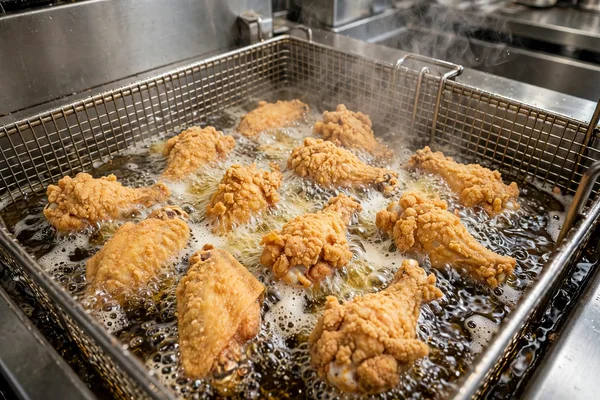
Step 7: Serve the wings hot
Place the hot, crispy wings on a plate or in a serving basket. Serve the wings immediately with mayonnaise and ketchup on the side. Hot wings lose crispness as the wings cool. Serve the wings fresh from the fryer.
Pro Tips
> Drain the wings on a wire rack over a tray. The tray catches the oil and the rack keeps the crust crisp on all sides.
> Serve with chilled drinks. Cold beverages cut through the chili heat and the fried richness.
> Rest the wings for 1 minute before serving. The coating sets as it cools slightly and becomes easier to handle.
- Use skin-on wings. The skin adds salty, oily flavor, helps the coating adhere, and produces a richer result.
- Keep your hands dry at the coating station. Wet hands destroy the coating.
- Coat 1 to 3 wings at a time. Overcrowding reduces the crumbs that define the crispiness.
- Keep the wings buried in the flour while twisting. Exposed spots produce patchy coating.
- Filter the flour after every 4 to 5 wings. Clean flour gives consistent results.
- Maintain 200°C oil temperature. Smoking oil creates bitter flavor.
Nutrition
A serving of 3 wings provides an estimated 750 calories, 45 grams of protein, 30 grams of carbohydrates, and 50 grams of fat. These values use the Atwater system: 4 calories per gram of protein, 4 per gram of carbohydrate, and 9 per gram of fat. They cover the wings, flour coating, and absorbed frying oil; mayonnaise on the side adds about 100 calories per tablespoon.
A 3-wing serving covers roughly a third of the 2000 to 2500 calories an adult needs per day according to the World Health Organization. The protein is genuinely high: one large egg provides about 6 grams of protein according to USDA FoodData Central, and these 3 wings deliver about seven times that amount. The absorbed frying oil supplies most of the fat.
Note
Wings are calorie dense because of the coating and the frying oil. Two to three wings make a satisfying portion with a light side salad.
FAQs
Can I use skinless wings?
Yes, skinless wings work. The skin adds salty, oily flavor and helps the coating stick firmly, so skin-on wings deliver richer flavor and a thicker crust. Skinless wings produce a lighter result with less depth.
Do restaurants use monosodium glutamate (MSG)?
Yes, many restaurants in Pakistan use monosodium glutamate (MSG), although the government of Pakistan has banned it and restaurants face heavy fines for using it. This recipe does not require MSG: the soy sauce and garlic powder provide sufficient savory depth.
Why did my coating fall off in the oil?
Three causes: wet hands at the coating station, shallow flour coverage during twisting, and low oil temperature. Correct these three factors and the coating stays attached.
Can I fry at a lower temperature or for less time?
No. Lower heat or shorter time produces pale, greasy wings with raw centers. The 200°C temperature and 18 to 20 minute duration cook the wings fully and build the golden crust.
Conclusion
This method reflects professional kitchen practice: the 3 to 4 hour marinade, the press-and-twist coating, the 30-second water dip, the 200°C fry. Follow the stages in order for golden, craggy, crisp wings.
Tell me about your results and ask questions in the comments. I read every one.
Related recipes
BBQ & GrillBalochi Sajji