 TroubleshootingWhy your naan does not puff on the tawa (and how to fix it)
Why your kheer sticks to the bottom and burns
Scorched kheer? Fix it with the right pan prep, heat curve, stirring rhythm and sugar timing.
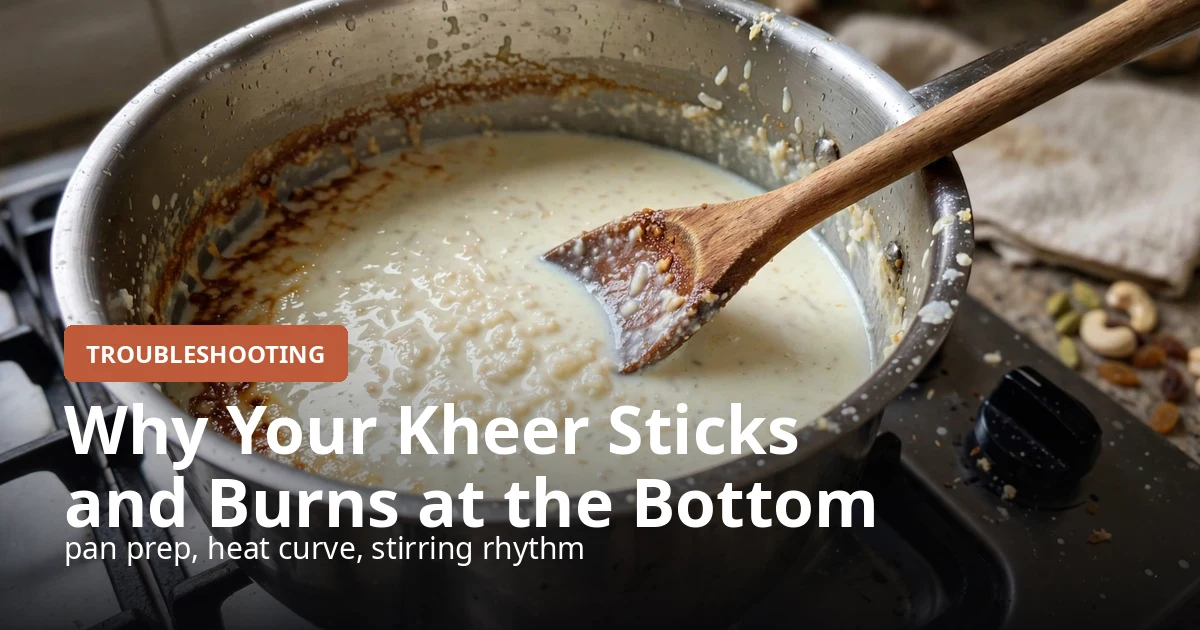
Milk is about 87 percent water. The remaining 13 percent, lactose, proteins, and minerals, sinks and scorches when the thin layer at the bottom of the pan overheats. That small fact explains every burnt kheer disaster. The cook who walks away for two minutes returns to find a brown crust welded to the pan base and a smoky taste spreading through the whole pot. Kheer needs long, slow cooking, and long cooking punishes every shortcut in pan choice, heat level, and stirring rhythm. This guide shows how a thin pan, rising heat, late sugar, and careless stirring combine to burn the bottom, and it gives you a reliable method for creamy kheer with a clean pan. Keep reading to fix the problem for good.
The problem
Kheer should taste of slow-reduced milk, soft rice, and cardamom. One burnt patch ruins that promise in seconds. The milk solids that catch on the bottom carry a bitter, smoky flavor that no amount of cardamom can hide. Guests notice it in the first spoonful, and the cook knows the batch is lost before serving starts. The frustration doubles because kheer demands patience. It simmers for 60 to 90 minutes, and the cook stands guard over the pot the entire time. To lose an hour and a half of work to a blackened base feels like a personal insult. Many cooks respond by stirring frantically, which breaks the rice grains and turns the kheer gummy. Others crank the heat to finish faster, which burns the bottom even sooner. The real answer is not more effort. It is the right sequence of pan preparation, heat control, stirring rhythm, and sugar timing.
Common causes
- Using a thin-bottomed pan. Thin steel or aluminum pans create fierce hotspots directly above the flame. Milk solids gather in those hotspots and scorch within minutes. A heavy-bottomed pan or a thick-based kadhai spreads the heat evenly and buys you far more margin between stirs. If a heavy pan is not available, stack the pot on a flat tawa to diffuse the flame.
- Starting on high heat. Many cooks boil the milk hard at the start to save time. Aggressive heat drives the bottom layer of milk far above boiling point while the top stays cooler. The proteins at the bottom denature and stick before the rice even softens. Bring the milk up on medium heat and never let it hit a violent boil.
- Stirring the top but not the bottom. A lazy figure-eight stir moves the surface milk nicely and leaves the base untouched. Solids settle at the bottom within 2 to 3 minutes of stillness. Scrape the base with the flat edge of a wooden spoon or spatula on every stir, and reach the corners where the pan meets the sides.
- Adding sugar too early. Sugar drops to the bottom and caramelizes against the hot base long before the rice cooks. Early sugar also raises the boiling point slightly and thickens the milk, which traps heat at the bottom. Add the sugar only in the last 15 minutes of cooking, after the rice has turned completely soft.
- Walking away during the first 20 minutes. The milk is most vulnerable before it thickens, because thin liquid circulates heat fastest to the bottom. Cooks who leave the pot in this window come back to a burnt base. Stay close for the first 20 minutes, then settle into a steady rhythm.
How to fix it
- Choose a heavy-bottomed pan or kadhai, or set your regular pot on a flat tawa to spread the flame.
- Pour in the full amount of milk and bring it to a simmer on medium heat, stirring once so the base gets a clean start.
- Add the soaked and drained rice only after the milk reaches a steady simmer.
- Lower the heat to medium-low so the surface shows lazy bubbles, not a rolling boil.
- Scrape the bottom and corners of the pan with a flat wooden spatula every 3 to 4 minutes.
- After 45 minutes, check the rice. It should crush easily between your fingers.
- Stir in the sugar only now, in the last 15 minutes, and keep scraping the base as the sugar dissolves.
- Add cardamom, saffron, and nuts in the final 5 minutes.
- Switch the heat off when the kheer coats the back of a spoon. It thickens further as it cools.
- Transfer the kheer to a serving bowl at once. Leaving it in the hot pan continues cooking the base layer.
Pro tips
- Rinse the rice and soak it for 30 minutes. Soaked grains cook faster, which shortens the danger window.
- Rub a thin film of ghee across the pan base before adding milk. The film delays sticking noticeably.
- Use a wooden spatula with a flat edge rather than a round spoon. The flat edge scrapes the base clean.
- Never scrape up a burnt crust and mix it in. Transfer the unburnt kheer to a fresh pot and leave the crust behind.
- Cook kheer in a wide pan rather than a tall pot. A wide surface evaporates milk faster and shortens total cooking time.
FAQs
Does a nonstick pan prevent kheer from burning?
Yes. Nonstick coating gives the milk solids nothing to grip, which cuts sticking sharply. Use medium heat even with nonstick, because overheating damages the coating.
Can I rescue kheer that already smells burnt?
No. Once the burnt flavor spreads through the milk, no fix removes it. Transfer the unburnt portion to a fresh pot only if you catch it early, before the smell reaches the top layer.
Should I cover the pot while cooking kheer?
No. Covering traps steam, slows evaporation, and stretches the cooking time. Leave the pot uncovered so the milk reduces steadily.
Does adding condensed milk change the burning risk?
Yes. Condensed milk adds sugar from the start, and early sugar raises the burning risk. Reduce the regular sugar by half and keep the heat lower than usual.
Why does my kheer turn too thick after cooling?
No mistake happened. Kheer thickens considerably as it cools because the rice keeps absorbing liquid. Cook it slightly thinner than your target and let the cooling finish the job.
Conclusion
Kheer burns because heat reaches the bottom faster than the cook manages it. A heavy pan, medium-low heat, base scraping every few minutes, and sugar in the last 15 minutes remove every cause. Follow this sequence and your kheer stays creamy, pale, and fragrant from first spoon to last.
Related topics
['TroubleshootingWhy your naan does not puff on the tawa (and how to fix it) ', ' TroubleshootingWhy your samosas break open while frying
 TroubleshootingWhy your seekh kebabs fall off the skewer
TroubleshootingWhy your naan does not puff on the tawa (and how to fix it)TroubleshootingWhy your samosas break open while fryingTroubleshootingWhy your seekh kebabs fall off the skewer
Comments
Comments are saved in your browser only.